The Making of "Passworks"

written by: Jamie • Sep 23, 2020 • category: dev • 4559 words • ~ 25 minute read • Subscribe to RSS feed for blogs
In this post, I’ll discuss the process of building Passworks, an educational module consisting of several activities designed to teach password security concepts.
The activities demonstrate the importance of password length, using a variety of different character types in a password, having a unique password, and being aware of social engineering attacks. Throughout this post, I’ll talk about the logistics of the development process, how I made certain technical design decisions, content presentation, problems I had to debug, and some other (hopefully) fun and interesting things I encountered during development.
Logistics
Overall, the project’s development consisted of these stages: proposal, content development, and a loop of coding, testing, and review/feedback.
The project spanned approximately one quarter, with most of the development occuring in the span of a month. The project was first proposed by a member of ACM Cyber, Alyssa, and was intended to be a series of educational activities designed to introduce password security concepts. She fleshed out some intial ideas of which particular topics to cover and some ideas on how to present them as fun activities (rather than lectures). The folks over at CityLab at UCLA were also interested in the idea for an event they were hosting, and become involved in the curriculum development. They were able to provide some details on the target audience of the project (high school students) and provided feedback throughout the development process on course content.
In general, the communication between Teach LA and CityLabs was pretty smooth. My outreach team members (particularly Leo and Matt) did an amazing job of communicating with the CityLabs team and breaking their thoughts down for me, so I had a pretty fair idea of what needed to be done at any given time. Though I occasionally felt a bit pressed for time due to the project deadline, the clear communication was really helpful in managing tasks and work to be done for the project.
I was also fortunate enough to have frequent code reviews and design/content feedback from the Teach LA team and testers, which was very useful during the development and iteration process.
Tech Stack
Like all other Teach LA learning lab modules to date, this project is a web app. I decided that it wouldn’t require persistent storage of user information, and thus does not require a backend or database. I chose to use React because I had prior experience with it and for its component reusability. I also decided to use Material-UI, which I had less experience working with at the time, in order to leverage their quality prebuilt UI components.
Targeting Our Audience
As the app was intended for an audience of high-schoolers, it was important that the contents and presentation of the material reflected that.
On the side of content development, we made sure to think of activities that allowed the users to make choices (like which password to input), and more interactive or relatable activities like the Social Engineering Activity with a mock Instagram. In addition, I made use of animations in various parts of the app to make it more visually appealing and interesting. I also made it a priority to present the lesson contents in an engaging and conversational tone. Notably, each topic is introduced through a scripted mini-conversation between the user and a “Hackerman” friend.
Another important consideration during development was how to handle swear words and inappropriate content during the Common Passwords Activity. For this section, I made sure to only output whether the user’s input was in the list or not, and not repeat what the user input was. For example, I didn’t want the app to say “The password you input, ****, was in the top 10,000 most common passwords!” In the later section displaying the Most Common Passwords, it was necessary for us to manually go through the list of passwords and curate the appropriate ones (shout out to Matt!).
Design Decisions During Development
To be honest, I was pretty daunted by the task at hand when I was initially presented with the project proposal and the content planned. I worked off of this initial design, created by Alyssa, to get a sense of the general structure of the project. However, I was afforded a lot of flexibility in the details of the implementation and what exactly to present. After looking through the Figma, I spent some time planning to figure out each stage of the various activities, and the basic layout and shared components each activity would need to use. From there, I started building up components and getting a small version of the app working. In this section, I’ll discuss some of the more significant design decisions I made, and my reasoning behind them.
The Lesson Framework
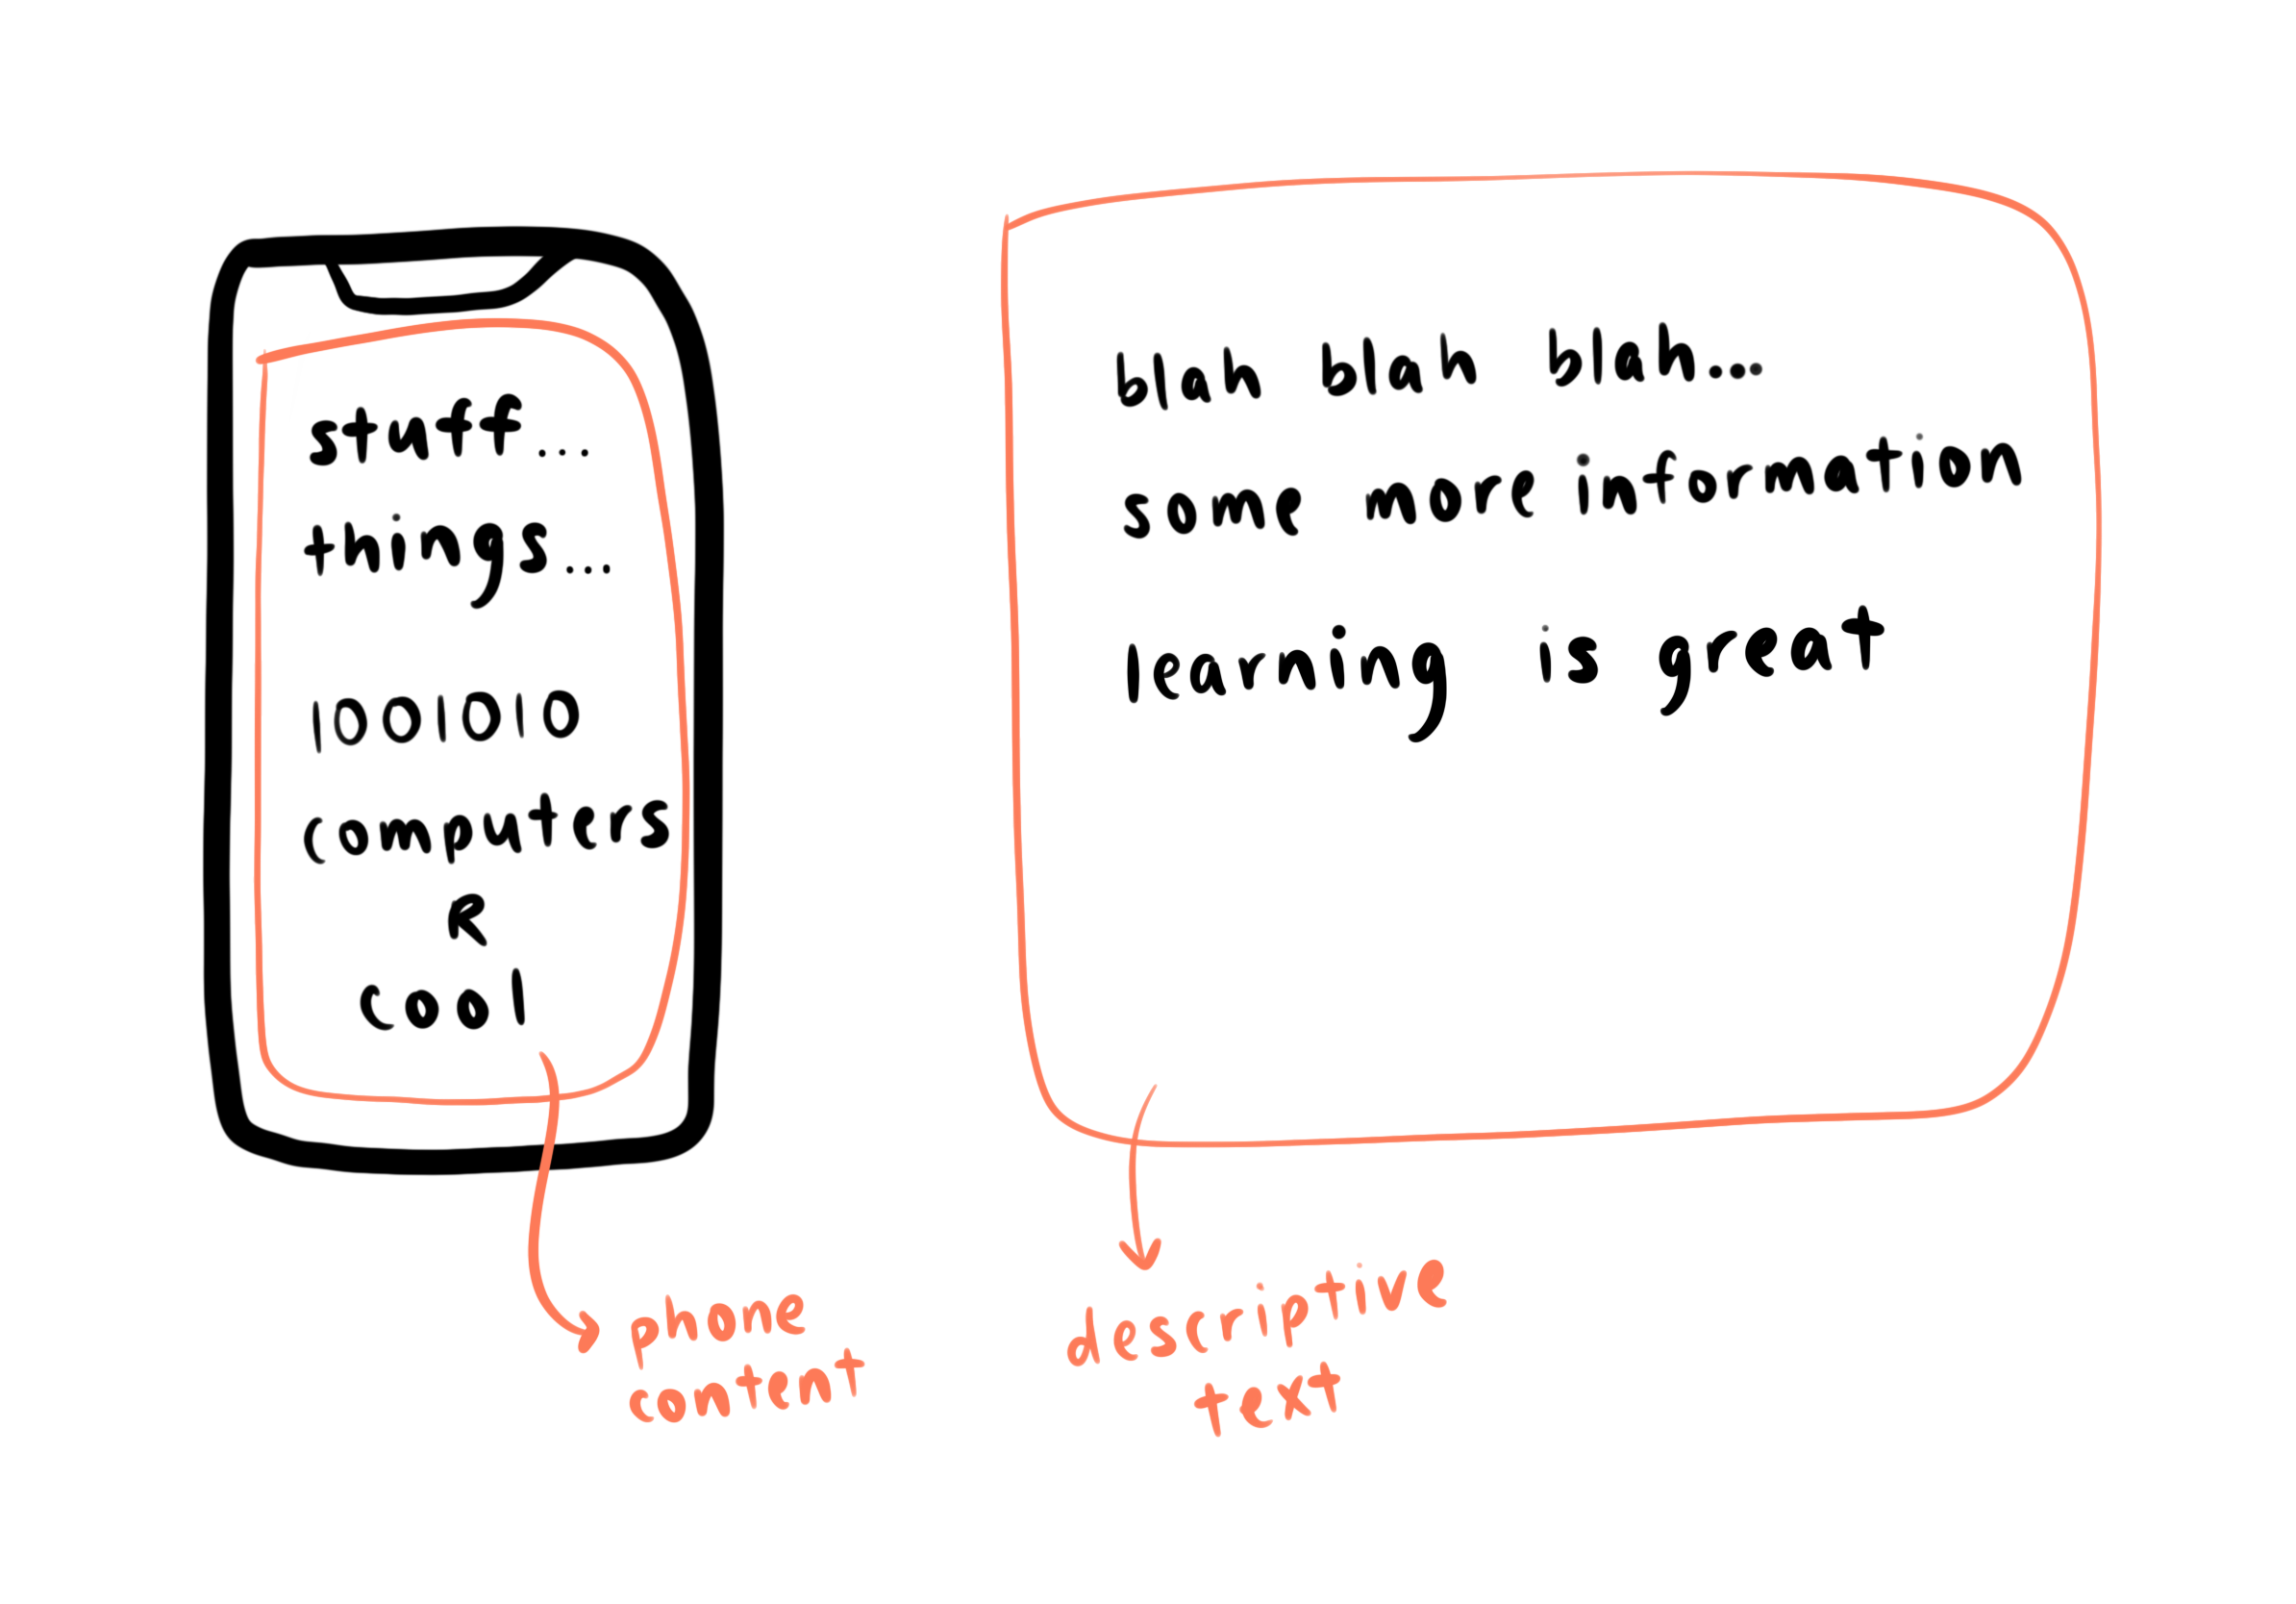
Probably one of the biggest decisions during the building of the app was how I would store the lessons/activities in the app. As I was fleshing out some details in the activities, I noticed that each “slide” of a lesson would consist largely of the same elements, in particular, some descriptive text and some content on the phone (see poorly drawn example below).
In addition, there were many instances where two different activities would be able to reuse previous components. For example, the first two activities both feature a password input and password generator. I realized that I could create a declarative framework, where each lesson is defined by an array of JavaScript objects. For example, the block of code below represents a single slide in a lesson:
[
  // ...
  {
    slide: (
      <Typography>
        Type a 4-digit password (or press Randomize to generate one
        automatically), and press Submit!
      </Typography>
    ),
    input: true,
    inputNum: 1,
    inputType: "num",
    inputDesc: "4 digits",
    inputLength: 4,
    checkInput: (str) => /^\d{4}$/.test(str),
    defaultInput: () => getRandom("0123456789", 4),
    phoneContent: inputForm,
  },
  // ...
]
The slide looks like this when rendered:
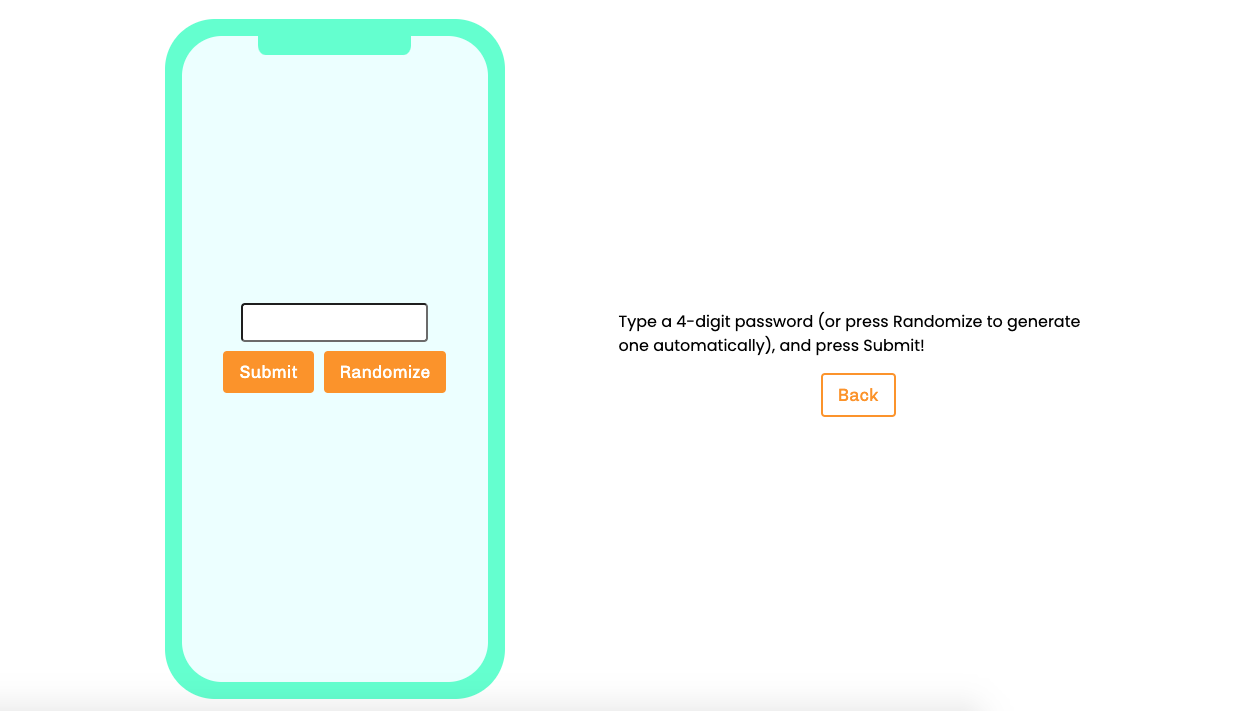
Using such a format allows the app to process the information in each slide of an activity, and use the information to decide what to show on the webpage. This framework also has the added benefit of making the lessons easily extensible, since additional lessons or lesson slides can be easily added by adding more objects to the list (rather than needing to write a bunch of actual code).
The framework was built up very incrementally. When I first implemented the framework and the app only had a few core features, the lesson slide objects had a limited number of properties. For example, in this very initial version of the app, only the slide, input, usesInput, inputType, and inputLength properties existed. As more activities were developed, and more requests made for features in activities, the number of possible keys and options grew, making the structures more complex.
This incremental approach when coupled with the inherent complexity of the phone screen admittedly resulted in some less-than-perfect code, as I had to do some workarounds to get certain features working. This whole chunk of code is responsible for rendering various different items on the mock phone screen in the app, and is not the prettiest to look at. This is largely because the phone screen component is generic and must be able to contain a wide variety of different components (the password guesser, chat messages, input forms, etc.), each with different required props. It’s possible that figuring out every aspect of the app before starting development would have made some code much cleaner, but a lot of the activities were being iterated on during development. Pre-planning the entire lesson framework might have then resulted in unnecessary complexity or dead code in the app by the app’s completion.
You can check out the overall lesson structure here.
Making Things Generic
If you checked out the lesson structure, you may have noticed that there were quite a few Chat components, which are rendered as mock text-message conversations on the phone screen like so:
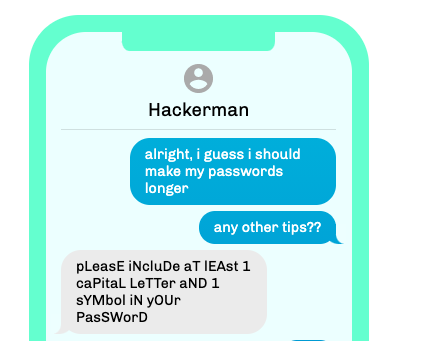
However, it wasn’t always this way. Initially, only the final activity of Social Engineering was going to have the chat messages, so I hard-coded an array of messages for the Chat component to render. The chat bubbles turned out to be quite popular with our beta testers, who encouraged me to use it for the other lessons as well. So, I made the Chat component generic by allowing it to accept a list of chat messages as a prop. You can check out the commit where I did so here.
This process is also how I made a number of other components generic and re-usable in an incremental fashion. I first used a set of mock data to get a working version of the feature, and then extended the component to be generic and able to accept different sets of data. I feel that this approach of making specific cases work and then generalizing reflects good software engineering practices, as it speeds up development and makes it easier to see how a feature (like the Chat component) might fit into an overall project before writing a bunch of code to include it.
Custom vs. Prebuilt
There were several occasions during the app when I had to decide whether to use a prebuilt component or library, or create a custom component to accomplish something. On one hand, I wanted to use tools that were tailor-made for my requirements. At the same time, I wanted to avoid falling into the trap of trying to reinvent the wheel. I’ll give a couple examples of these decisions, and give some insight on how I made them.
One example of a prebuilt component I used is react-countup, which, in its most basic form, renders a simple animated counter to a number of your choice. It turns out that implementing such a component from scratch can be quite difficult, as there are a number of things to consider such as screen’s refresh rate and how to prevent jank. In addition, the react-countup module turned out to be surprisingly flexible for a wide range of use cases, making it quite suitable for the app. I’ll discuss more about how I used the module later in this post, but here’s a quick preview of how it looks in the app:
In other places, I chose not to use prebuilt components. For example, I decided not to go with a prebuilt router library for activity navigation. The router for the activities did not need to be very flexible, since the format of the activities was quite rigid (each activity having some number of slides). Existing router libraries are generic and overly powerful, so customizing them for my own use case would likely require some sort of middle layer anyway. As a result, I decided to write my own simple router.
If you looked through the source code of the app, you might be wondering: “But wait a second, I looked at the App.js file and React Router is used?” Initially, the app consisted only of the activities, but was later extended to include other sections like the “Most Common Passwords” and “Password Games”. We ended up needing to modify the app to use a prebuilt router in order to handle this increase in scope, so now we use React Router for the overall app, as well as a custom router for nagivating through the activities.
Bugs Encountered
While it’d be impossible for me to create a comprehensive list of every bug I encountered during development, here are a few notable or particularly interesting ones and how I solved them.
Text Animations
I encountered some interesting behavior with the animated text messages, where the animation did not refresh if the user navigated to a new activity. So, if I was on the first activity and two messages had been animated on the screen, and then I navigated to the second activity, there would already be two messages on the screen. The desired behavior, of course, would be to have the animation start anew once I clicked to the second lesson.
After some digging, I found out that the problem involves the way that React manipulates the DOM, which is basically a representation of the content on the page. Essentially, React changes the DOM in order to change what is shown on the page, and this can be computationally expensive. For performance benefits, React will sometimes attempt to reuse components to avoid re-rendering content that doesn’t need to be re-rendered. However, since these reused components are not newly created, the browser does not know that it should animate them. To force React to remount the Chat component, I decided to leverage React’s key prop, which is used to identify a component and control its reuse.
Finally, to ensure a unique key for each Chat component, I adopted a singleton pattern:
let chatKey = 0

const getChatKey = () => {
  chatKey += 1
  return chatKey
}
In each Chat component, I passed in key={getChatKey()} to generate a unique key for each copmonent. What this does is ensures that React does not reuse a previous Chat component, and instead creates and renders a new Chat component when the screen changes. As a result, the animation starts from the beginning each time we switch between activities.
react-countup Bug
I encountered a strange bug after deciding to print the counter’s output to the console (while debugging a different issue). I had set a 10 second delay for the counter to automatically start, and I discovered that the counter would start after waiting out this delay even if I navigated to the next slide, where the counter shouldn’t exist. It appeared that the useCountUp hook wasn’t unmounted properly when it should have.
One workaround I tried out was setting the delay prop to be a really high number, effectively high enough that the countup wouldn’t start until after the user finished using the app and closed it.
This bug and the workaround I implemented were quite unsettling, so I investigated the source code of the useCountUp hook that I was using. I found the following code snippet from this file:
useEffect(() => {
  const { delay, onStart, onEnd, startOnMount } = _props;
  if (startOnMount) {
    const timeout = setTimeout(() => {
      onStart({ pauseResume, reset, update });
      getCountUp().start(() => {
        clearTimeout(timeout);
        onEnd({ pauseResume, reset, start: restart, update });
      });
    }, delay * 1000);
  }
  return reset;
}, []);
React’s Effect Hook provides a way to initiate operations with side effects in a component. In order for the hook to clean up resources when the component gets unmounted, the useEffect callback can optionally return a clean-up function. That’s exactly what happens here with the return reset statement, which would correctly delete a started counter upon unmount. However, note that in the if-block there is a setTimeout() that doesn’t get cleared in the cleanup section, which can cause the counter to start even if the component has been unmounted!
Since having the counter automatically start after mounting was not necessary in this case, I simply set the startOnMount prop to be false. This meant that setTimeout was never called, and thus wasn’t an issue any longer. However, this fix wouldn’t work for cases where starting on mount is desired.
Fortunately, someone else caught the same bug and filed a PR to fix the issue by clearing the timeout. One more commit was required to actually fix the bug (due to scope issues with the timeout reference), and can be seen here.
Components vs. Hooks
This is not so much a bug as it was something I noticed or learned throughout the development process, especially working with the react-countup module. Initially, I had a lot of difficulties implementing the timer portion of the password-guessing slide, since both of them used the component form of the react-countup module and I didn’t know how to connect them to the same start button. I believe a lot of this can be attributed to confusion with components and the fact that composing two CountUp components is non-trivial. I ended up switching from the component implementation of CountUp to the useCountUp hook, and things became much more simple.
This commit contains most of the work I had to do while transitioning from components to hooks, and provides a decent illustration of the gains from fully switching to hooks. In particular, compare the following code snippets: the first using the CountUp component and the second using the equivalent hook:
return (
  <CountUp
    start={0}
    end={100}
  >
    {({ countUpRef: ref1, start: start1 }) => (
      <CountUp
        start={0}
        end={100}
      >
        {({ countUpRef: ref2, start: start2 }) => (
          <Box>
            <span ref={ref1} />
            <span ref={ref2} />
            <Button onClick={() => { start1(); start2(); }}>Start</Button>
          </Box>
        )
      </CountUp>
    )}
  </CountUp>
);
const { countUp: countUp1, start: start1 } = useCountUp({ start: 0, end: 100 });
const { countUp: countUp2, start: start2 } = useCountUp({ start: 0, end: 100 });
return (
  <Box>
    <span>{countUp1}</span>
    <span>{countUp2}</span>
    <Button onClick={() => { start1(); start2(); }}>Start</Button>
  </Box>
);
Some advantages of the hook approach compared to the component approach can be seen in these snippets:
<CountUp />version is more verbose<CountUp />version has unclear data flow: where docountUpRefandstartcome from?<CountUp />version has greater nesting;useCountUpprovides idiomatic straight-line code<CountUp />version requires knowledge of advanced React features, like refs- The opaqueness of the
<CountUp />version leads to cargo culting. Certainly in my case, I did not fully understand how the component version worked, and the code I wrote was heavily based on samples provided by the module’s documentation.
Overall, I had a much better experience working with hooks in this case, and I’ve gained an appreciation for their flexibility and how intuitive it is to use them.
Some More Fun Things
Some aspects of this project were really fun to work on and figure out, so in this section I will discuss a few of those.
Randomize Button
For the first two activities, the user is able to input passwords of their own choice (within the limitations of the activity). However, they can also press the “Randomize” button to have the input be automatically populated by a valid password for the section.
I implemented this button using a few utility functions, which can be found here. I implemented a simple randomInt(min, max) function to randomly pick the an integer inclusively between min and max. I also implemented the getRandom(str, n) function to randomly select n of characters from an alphabet consisting of the letters in str. Finally, I implemented a shuffleString(str) function to shuffle a string of characters.
The most interesting case I used these functions for was the mixed-case password. I first randomly picked the number of uppercase characters, then generated the appropriate-length strings of lowercase characters and uppercase characters, and finally combined and shuffled them using shuffleString.
Though the algorithms are not the most complex, they were fun for me to implement and test!
Regular Expressions
I used regular expressions to validate user inputs by writing callbacks that tested the user’s input against hard-coded regular expressions. They weren’t particularly advanced, but it was a reminder of how cool and powerful regular expressions can be (and provided me some much-needed practice).
Counting Up to Strings
As previously promised, I’ll discuss how I took advantage of the react-countup module’s flexibility. While it was relatively straightforward to implement a brute-force password generator for numbers by using this module, I needed some way to use the module to generate strings in a similar fashion. A look into the API of the react-countup module revealed a formattingFn prop, which accepts a function that accepts a number and returns a string.
I wanted to be able to use the react-countup module to display the password generation for strings of letters. Thus, I needed a way to convert a user’s input string of letters to an integer value, something that the useCountUp hook could use as an end value. I also needed a way to convert the number output back to a string of letters for the user to see.
I came up with the following utility functions, the source file of which you can see here.
function toLetters(num, alphabet) {
  const mod = num % alphabet.length
  const pow = Math.floor(num / alphabet.length)
  const out = alphabet[mod]
  return pow ? toLetters(pow, alphabet) + out : out
}

function fromLetters(str, alphabet) {
  if (str.length === 0) {
    return 0;
  }
  const out = str[str.length - 1]
  const pow = fromLetters(str.slice(0, -1), alphabet)
  const mod = alphabet.indexOf(out)
  return pow * alphabet.length + mod
}
These functions convert between numbers and strings based on a particular alphabet, which dictates the character set available. They implement a special case of base conversion, but rather than using 0–9 (base 10), they use a–z (base 26) or any ordered set of characters.
The toLetters function converts a number to the corresponding string. It computes the modulus as well as the quotient of the input number with the alphabet length. The modulus is used in order to obtain the current letter, and the quotient is decremented before being used in a recursive call to compute the rest of the string. The fromLetters function converts a string to the corresponding numeric value. It recursively processes each character starting from the last one in the string, and performs the reverse operations done in toLetters.
fromLetters("bb", "abc")
toLetters(5, "abc")
An interesting thing about this algorithm is that all strings including only the first character in the alphabet are mapped to 0 when converted to numbers. The reason behind this is that the first character is treated as a padding character. In the app, the users are required to input a 6-character password consisting of only a subset of letters from the alphabet. Count up from the 6-letter password “aaaaaa” is thus analogous to counting up from “000000” in the numeric case.
Below is a list of entries that show the conversion between numbers and letters for the alphabet consisting of characters a–z:
   0 "aaaaaa"     26 "aaaaba"     650 "aaaaza"
   1 "aaaaab"     27 "aaaabb"         ...
   2 "aaaaac"         ...         675 "aaaazz"
      ...         51 "aaaabz"     676 "aaabaa"
  25 "aaaaaz"         ...             ...
Final Thoughts
Overall I had a great experience and got to experiment with a lot of cool new things. Though this was a small app, I was able to experience a lot of things that happen in the process of software engineering:
- how changes in user requirements can lead to changes in technologies used
- how developing incrementally increases velocity
- working with and debugging previously unfamiliar technologies
I also want to give a huge shout out to unDraw, which was the source for all the beautiful visuals in the app.
If you made it all the way to the end of this post, thank you for bearing with me. I hope you enjoyed, and please reach out to me if you have any questions or comments! :)
Author